How to Build a WhatsApp AI Agent: A Personal Assistant Guide

You’ve been asking how to build a WhatsApp AI agent, and why I still hadn’t written a guide about it. The truth is, I’ve wanted to write this guide for a long time, but I had quite a few hesitations. There are several ways to build an AI assistant that talks to you through WhatsApp. You can do it with Anthropic’s Claude Code, with OpenAI’s Codex, or with other tools. And it doesn’t even have to be WhatsApp — some people will tell you Telegram is the better choice, since it was built from the ground up to work well with bots. If that option interests you, you can also check out my guide to building an AI agent on Telegram with Claude. But I asked myself a simple question: which approach would give most people the most value in the least amount of time? What would be easy to set up in minutes, without getting too complicated, and without giving up the capabilities that actually matter? In the end, I chose to build this guide around Base44. A Spoiler, But a Good One I hope you enjoy reading what I write about AI. But if you’re in a bit of a hurry, feel free to jump straight to the hands-on part and go through it step by step. My estimate: setting up and launching the agent will take 45 minutes at most, and for many of you, even less. And if your time is especially valuable, there’s a quick-install option waiting for you at the end of the article. Instead of going through the whole process, you can click a link, scan the code, approve the connections, and launch the agent. Won’t you at least buy me a coffee for saving you all that work? Quick Install What Can You Do With a WhatsApp AI Agent? A WhatsApp assistant that you can even give voice instructions to isn’t just a gimmick. It’s a working tool that can become a meaningful part of your daily routine from day one. And even if you’re not in the business world, I’m sure you’ll find a lot of value in a personal assistant on WhatsApp. Fair warning: this can turn into a habit that’s very hard to break. Once you get used to having someone to send an idea, a task, or a reminder to the second it pops into your head, you won’t want to go back to the old way of doing things. Connecting to WhatsApp opens another door into the world of AI. But I don’t want to speak in slogans, so here are a few genuinely useful examples. Never Forget Birthdays None of us wants to forget an important birthday. We want to make friends and family happy and wish them a happy birthday on time. For that, there are reminders on social media, Google Calendar, and I know people who still write everything down in pen on a paper calendar. With a personal agent, you can connect your calendar and ask it to remind you every morning — or the day before, if you prefer — whose birthday is coming up. Personal Secretary You’re stuck in traffic and a thought suddenly crosses your mind. Maybe you remembered something urgent you need to do tomorrow, or an idea for a new project just popped up. If you don’t write it down immediately, there’s a good chance it’ll disappear. I know people who send WhatsApp messages to themselves. Now you can just send the message to the agent instead, and it will log it and remind you at the right time. Invoice Collection Collecting invoices for tax and VAT reports is one of the most tedious tasks in a freelancer’s life. But it has to be done. Collecting invoices through WhatsApp isn’t a new idea — I’ve been using a solution like this for years. But a WhatsApp agent equipped with AI can deliver a lot more value than simply saving a file into a folder. Shopping List When I started experimenting with a personal assistant, my first attempt was building an agent for a shopping list. There’s hardly a supermarket trip where I don’t remember on the way home that I forgot to buy the one item that was the whole reason I went to the store in the first place. Honestly, I didn’t expect it to be this useful. That simple action turned out to be one of the agent’s most powerful capabilities, as far as I’m concerned. Collecting Important Information From WhatsApp Groups Who among us isn’t a member of a few WhatsApp groups that bombard them with messages and discussions? I’m in groups about automation, AI video creation, and a few other topics close to my heart. On one hand, these groups are great for getting help and learning a lot. On the other hand, they’re a constant drain on your attention all day long. Then you wake up in the morning to find 341 notifications. You don’t want to miss anything important, but good luck finding it in all that noise. A personal agent can help collect and summarize the important things, instead of you having to scroll through hundreds of messages yourself. These are just a few ideas from my own world, things that are useful to me personally. Every person has different occupations, hobbies, interests, and needs, and will need different capabilities accordingly. That’s one of the interesting things I get to do as an AI automation studio working with individual clients. I talk with the client, understand what they actually need, and build them an AI system that fits their life — not one that just looks impressive in a demo. A Few Things Worth Knowing This guide covers building a WhatsApp agent using Base44. Fortunately, the platform also offers a free plan that lets you start working with a useful agent, though the free account is limited in daily and monthly credits. Heavy users may prefer a paid account. The
AI Hook Ideas: A Character That Pops Out of the Image
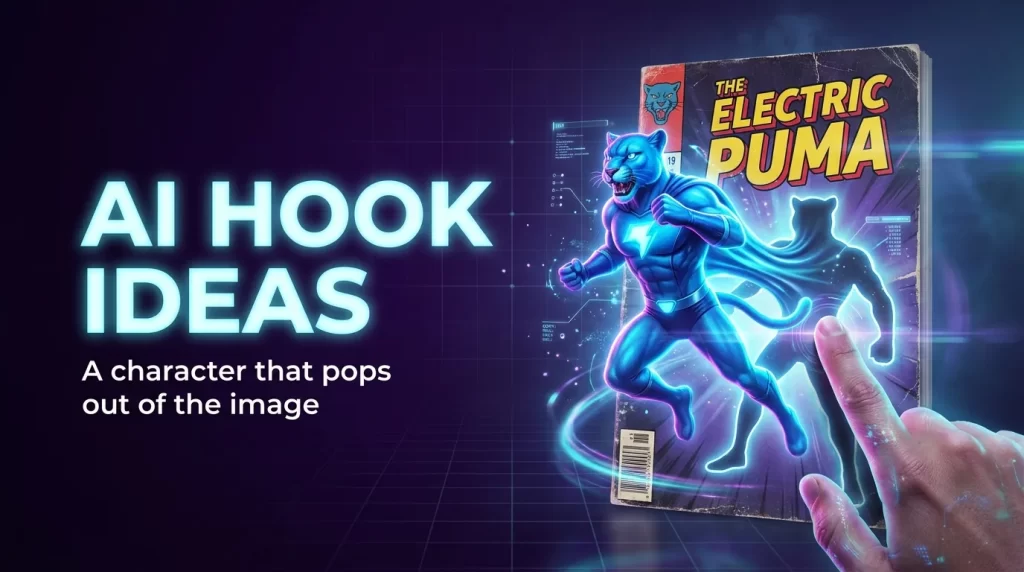
https://www.youtube.com/watch?v=7G042r56Ct4 Today I’m showing you one of my favorite AI hook ideas, and it actually works: take one character, generate it in a handful of completely different art styles — vintage comic, cyberpunk, modern anime, Art Deco — and then make it pop off the page and become a fully three-dimensional character, right in front of your eyes. If you want to stay relevant in AI video generation, you have to keep experimenting and pushing your skills forward, and I’m no exception: when I’ve got time and credits to burn, this is exactly how I spend them. That’s how I stumbled onto this one. It’s exactly the kind of thing that drives our day-to-day AI video production at the studio. One thing worth mentioning before we go further: the styles above are just a random example. You can run the same prompt formula on any character you pick, not just our blue puma. Even if it’s not a puma, ha. The images were made with ChatGPT. The “coming to life” effect was made with Google’s video tool. It’s really a simple two-step process: an image prompt first, then a video prompt that runs on that exact image. I’ll show you both, across four different styles I actually tested and that worked. Worth noting: the same effect could have been pulled off with other tools too. For images, Nano Banana or Recraft, for example. For video, Seedance, Grok, and others. I just worked with whatever I had open at the time. Hook Ideas: Why a Character Popping Out of an Image Works So Well The reason this works so well as a hook is that it’s unexpected. You’re looking at a completely ordinary comic book cover. Then a finger touches the illustrated character, and it just… gets up. Two-dimensional becomes three-dimensional, right in front of the camera, no editing, no cuts. The star of the trick is the studio’s mascot: an anthropomorphic blue puma, the Electric Puma, showing up again on “THE ELECTRIC PUMA” cover in every variation. I tested this across four completely different design styles, and all four actually worked, not just in theory. Vintage The first style reaches back to the Golden Age of American comics: thick black ink lines, flat colors, exaggerated cartoon proportions, and a big title shouting “THE ELECTRIC PUMA” in a confident vintage font. Here’s the full prompt, you can copy it as-is: PROMPTCopy Vintage 1940s American comic book cover featuring a full-body anthropomorphic blue puma standing confidently in the center. The puma wears a simple retro jacket, trousers and sneakers, with a bold yellow lightning bolt on the shirt. The pose is clean, iconic and easy to read, with both legs fully visible and a confident facial expression. The composition follows a classic Golden Age comic cover layout: one oversized central character against a simple warm gradient background with almost no scenery. Large hand-drawn comic title at the top reading “THE ELECTRIC PUMA” in bold vintage lettering inspired by 1940s comic design. Thick black ink outlines, clean brush linework, flat spot colors, minimal cel shading, limited color palette, expressive cartoon proportions, hand-painted vintage printing style, aged paper texture, subtle ink imperfections, slight print registration offset, lightly faded colors, authentic mid-century comic book cover aesthetic, simple graphic composition, highly readable silhouette, portrait. High-angle three-quarter view 9:16. Cyberpunk The second style is the visual opposite: a neon city, rain-soaked streets, glowing signs, and huge typography in bright yellow and hot pink, two colors most “safe” design guides would tell you never to combine. Here’s the full prompt: PROMPTCopy A bold cyberpunk comic book cover featuring a full-body anthropomorphic blue puma standing confidently in the center of the composition. The character wears oversized futuristic streetwear, a teal and magenta tech jacket, dark cargo pants, colorful high-top sneakers, fingerless gloves, and a black t-shirt with a yellow lightning bolt emblem. Yellow glowing feline eyes, confident expression, long tail visible, relaxed heroic pose with both feet fully visible. Behind the character is a gritty neon city with rain-soaked streets, towering buildings, cables, signs and urban decay. A large glowing yellow moon creates a dramatic halo behind the character’s head. The title “THE ELECTRIC PUMA” dominates the upper third of the cover in huge aggressive hand-painted brush lettering. “ELECTRIC” in bright yellow, “PUMA” in vivid hot pink. Small electric bolt icons decorate the title. Ultra-detailed comic illustration, graphic novel cover, bold black ink lines, expressive sketchy linework, vibrant cel-shading, neon cyan, hot pink and electric yellow color palette, graffiti-inspired shapes, textured brush strokes, high contrast, stylized urban dystopian atmosphere, premium comic cover design, centered composition, dynamic perspective, collectible comic book aesthetic, 9:16 vertical. Modern Anime The third style is different on one technical point: the prompt already describes a photo of a physical book, not flat artwork. That means at the video stage, the AI doesn’t need to “imagine” there’s a book there, it’s already baked into the source image. Here’s the full prompt: PROMPTCopy A premium comic book titled “THE ELECTRIC PUMA” lying diagonally on a worn wooden table, viewed from a high-angle three-quarter perspective, showing the front cover, spine and book thickness. The cover features a full-body anthropomorphic blue puma standing confidently in the exact center. Both feet are fully visible. The puma wears stylish oversized modern streetwear: a teal-and-black bomber jacket, relaxed cargo pants, colorful high-top sneakers and a black t-shirt with a bold yellow lightning bolt emblem. Hands casually inside the jacket pockets, relaxed confident posture, long tail visible, sharp yellow eyes, subtle confident expression. The illustration style is a modern anime-inspired fashion illustration with clean, elegant linework, expressive proportions, soft cel shading, painterly gradients, premium digital painting quality, subtle rim lighting, crisp details, balanced contrast and vibrant but controlled colors. The character has a stylish urban aesthetic rather than a superhero look. The background of the cover is simple and graphic, featuring an urban concrete wall with subtle graffiti-inspired shapes and abstract geometric forms in muted cyan, gray and warm orange accents, keeping
How to Create Funny AI Videos with One Prompt
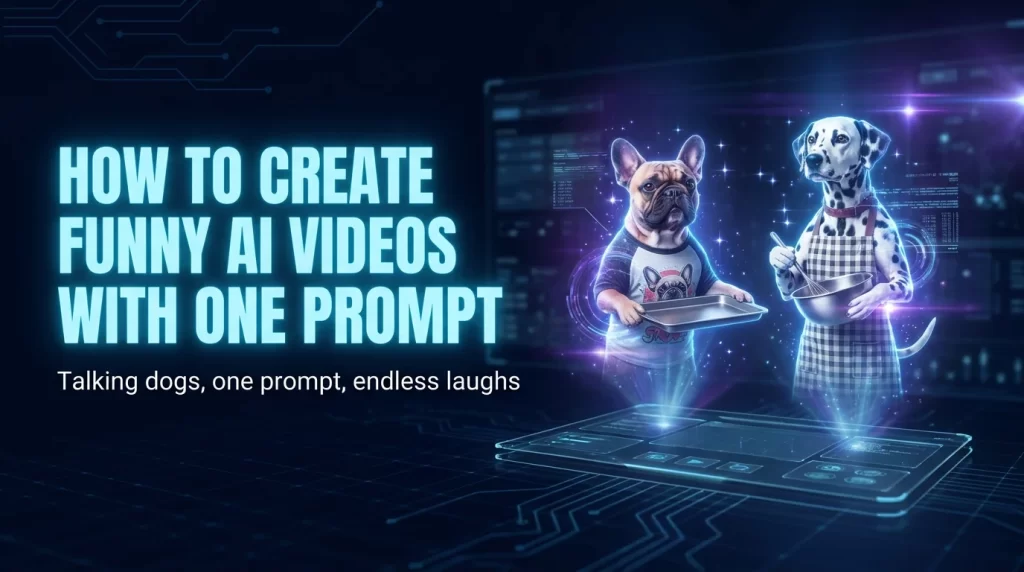
Animal videos consistently perform incredibly well on social media. They have that built-in “hook” that grabs attention immediately. And when you put animals in human situations, it turns into pure comedy gold. It used to require CGI specialists — today, anyone can pull this off with AI. So let’s make some fun AI videos. First, I’ll walk you through the basics, and by the end I’ll reveal the whole trick. Once you get it, you can take it further and create your own things in the same style — with your own personal twist. What do you need to make a funny AI video for social media We’ll build this with two powerful tools. The first is Nano Banana, which lets you create the base image. The second is Kling 3, which turns a single image into a full video — multi-shot! One of the best AI video trends I’ve seen in recent months. 📸 Follow us on Instagram Funny AI Dog Video – Quick Guide and Easy Prompt 1. Creating the Image Go to Nano Banana and paste the prompt below. You might need to generate a few images before you find the one that works for you. Photorealistic anthropomorphic French Bulldog and Dalmatian standing upright in a cozy modern kitchen. The French Bulldog is slightly chubby, wearing a casual t-shirt, holding a metal baking tray with both hands at chest height, looking forward with a calm neutral expression. The Dalmatian stands beside him wearing a small kitchen apron, holding a mixing bowl in one hand and an electric hand mixer in the other, positioned naturally as if mixing ingredients, with a focused and slightly playful expression. Both characters are positioned side by side, facing the camera, framed waist-up in a centered composition. Background shows a realistic modern kitchen with a countertop, oven, and soft warm ambient lighting. Subtle depth of field keeps the dogs in sharp focus while the background is slightly blurred. Lighting is natural and cinematic, soft shadows, realistic textures of fur, fabric, and metal surfaces. Camera angle: eye-level, medium shot, 50mm lens look, shallow depth of field. Ultra-realistic detail, high dynamic range, cinematic composition, sharp focus 📋 Copy prompt 2. Creating the Video with Kling 3 Enter the Kling 3 video model and select multi-shot, then the custom option. After that, copy and paste the 4 prompts below one after another to create 4 segments of 3 seconds each. Just remember — all the prompts build a single combined video! Only click generate once, after all of them are ready. 💬 Personal note: I created this prompt just a few days after Kling 3 launched. At the time, it was the best thing I’d seen — and even today, a few months later (which is basically forever in AI terms), it’s still in my top 3. For me, it’s a daily-use tool. The prompt you see here, as I mentioned, was created in the model’s early days. That’s just how it goes — every time a new model drops, you need to research and test it, and sometimes you make mistakes along the way. What I learned afterward: in practice there’s no real need to split the prompt the way I did here — that seems to be a feature that only exists in Higgsfield. Alternatively, you can just enter all the shots in one long prompt. Just don’t forget to specify the duration of each shot. Wide Medium Shot: Camera remains static, eye-level with the dogs, waist-up framing. The Dalmatian mixes batter energetically while the French Bulldog carefully holds the baking tray — light mixing sounds + cozy kitchen ambiance 📋 Copy prompt Close-Up High Angle: Camera cuts to a closer, slightly high-angle shot focusing on the mixing bowl. The mixer spins too fast, sending batter flying into the air — exaggerated splatter sound + sudden comedic burst 📋 Copy prompt Medium Close-Up: Camera returns to eye-level medium shot. The French Bulldog stands frozen, face fully covered in batter, eyes blinking slowly — awkward silence + faint dripping sound 📋 Copy prompt Reaction Close-Up: Camera slightly zooms toward the Dalmatian’s face. Expression shifts from shock to uncontrollable laughter — loud playful laughter + upbeat comedic timing 📋 Copy prompt https://youtube.com/shorts/pl1660JFKV0 Advanced Tips You can start playing with the prompt — for example, swapping the animal characters for different ones. Just keep in mind you’ll need to change both the image prompt and the video prompt accordingly. Try to give the video more value and turn it into something more than just an entertaining clip. For example, this could be the opening of an ad for baking products. It’s all up to your imagination and your AI skills. But bottom line — you can do anything. It’s worth remembering this doesn’t have to stay a generic funny video. The same method can become a completely personal joke — want to make someone close to you laugh? Use their own dog’s likeness instead of a random character, and you’ve got a funny, personalized gift. This same idea can also work as the opening for an ad — for food products, products for people or for pets — or even as a PSA, just with the right adaptation. And don’t forget, if you make something awesome, tag me on Instagram! Frequently Asked Questions Do I have to use Nano Banana? Not at all. When this article was written, Nano Banana was the best solution I’d found, which is why it’s what I recommend here. But there’s no reason you can’t use a different image generator you’re already familiar with — Midjourney, GPT, or anything else that works for you. Can I do this with human characters too, not just animals? Absolutely. The technique itself isn’t tied to animals — it works with any character you can describe in the prompt and put in a funny/human situation. Animals just tend to work especially well because the contrast between the “human” behavior and the animal itself is what
AI Video Prompts for Social Media — Step-by-Step Graffiti Reveal Guide
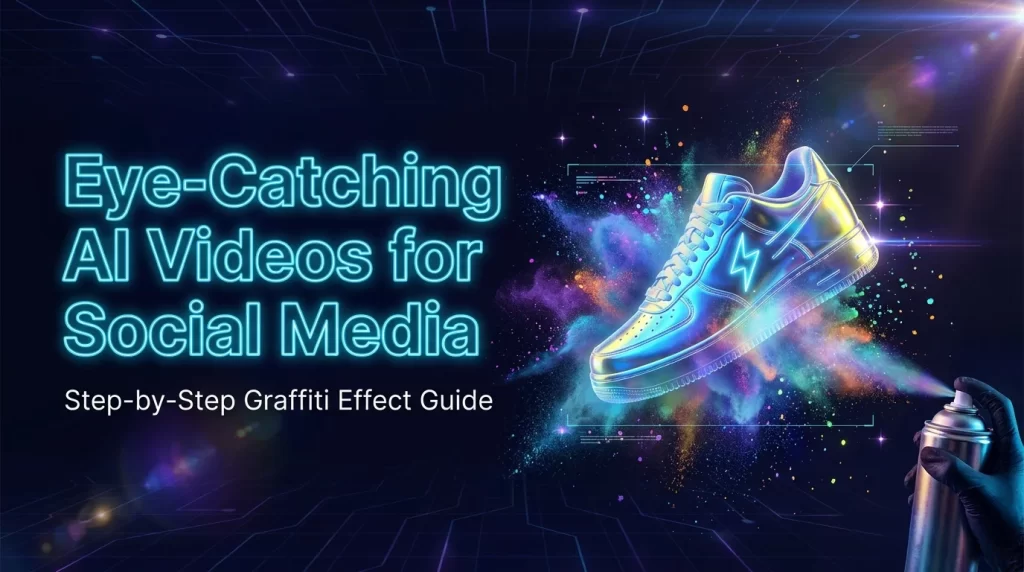
If you’re looking for AI video prompts for social media, one of the most useful things is prompts that can be adapted to different design styles and different purposes. And that’s exactly what I’m going to show you here — a fast, simple workflow that anyone can do, and that can be adapted to any brand or idea. The prompts here mostly reflect the design style that fits the branding of Electric Puma studio for AI video production. But you can absolutely change the design styles. And to show you that, I’ve also included the sneaker prompt, which is in a slightly different style. But really, you can apply any style here with ease — just like the AI sticker effect proves you can shift style and keep the same workflow. The main work, for anyone who wants to tweak this prompt a bit, is changing the base image. You can change the color and style of the background, and you can change the style of the artwork that appears on the wall. And of course, you can draw anything — it could be the name of a kid celebrating their bar mitzvah (maybe as a starting point for a bar mitzvah AI video), it could be your brand’s logo, or a message of love for a company. So this simple prompt genuinely has uses for personal projects too, and for anyone who wants to produce AI ads and content for social media. So let’s dive right into these eye-catching AI videos for social media. Want to see the final result before diving into the prompts? Here’s the guide on YouTube: How Is This Pipeline Built? This video isn’t created from a single prompt. It’s built from three steps that run across two different tools, with each step feeding the next: Image A — the colorful “final image” — created in an image generator (GPT-image). This is the finished product: holographic finish, studio lighting, industrial concrete wall in the background. But of course, you can also use Nano Banana or other image generators. And as I said, you can do this in different design styles. Image B — the “starting image,” a white outline — once you have the final image, you need the starting image. I chose to make white outline lines already drawn on the wall. Just as easily, you could do this on a plain wall (careful — the video prompt needs a tweak for that). To create the starting image, there’s an additional prompt to run with the first image as a reference. Here too, I challenge you to get creative and give the outline your own personal style. The video itself — created in Google Flow, with Image B as the opening frame and Image A as the ending frame. A hand with a spray can sprays over the outline, and the color is “revealed” in sync with the hand’s movement. In principle, this will work in any video generator that lets you work with a start frame and end frame, like Kling 2.5 or Kling 3. But I’ll note that my prompts were tested on Google Flow and worded to get the best result specifically in that video generator. The beautiful part: step 2 (turning the image into an outline) is a completely generic prompt — the exact same wording worked on the can, the t-shirt, and the sneaker, without changing a word. That saves a ton of time when you want to turn the concept into a series — just like the gel tube trend is also built on one base prompt adapted to different products. It was important to me to explain the workflow in detail, so it’ll be easier for you to make changes and create prompts for eye-catching AI videos for social media that have your own touch. Image-to-Image Generators Are Still Relevant — Despite All the New Capabilities I know there are more advanced models and different workflows out there, and some of you might be wondering why I keep writing guides about producing video using image-to-image. It’s tempting to think that now that we have new models that can generate entire videos from text alone, the image-to-image step (like step 2 in the pipeline above) has become unnecessary. That’s a mistake. Image-to-image is the only way to preserve exactly the shape, proportions, and angle of an existing object, while changing just one attribute of it (in our case — the color/texture). A model that generates video directly from text, without ready-made keyframes, will usually “reinterpret” the product in every variation — and that’s exactly what we don’t want when we already have a specific product design that needs to be preserved. So even with newer, more impressive tools on the market, it’s worth knowing this method and keeping it in your toolkit — it’s still the most reliable way to guarantee consistency between the first and last frame. Of course, the more advanced tools also know how to work with reference images, but that brings me to the second advantage of producing image-to-image videos — the price advantage. There’s a big price gap between models like Seedance and image-to-image models like Kling 2.5. So you don’t always need to rush to the newest, most expensive model. And in general, it’s worth getting to know all the models — that’s the only real way to create eye-catching AI videos for social media. Example 1: “Electric Puma” Soda Can I know this is a bit overdone — the internet is full of demo videos for energy drinks and cans. But like I said, you can swap in different products. Step 1 — Image A (colorful) A large hand-painted mural of a premium aluminum beverage can on a raw industrial concrete wall. The artwork is created in a realistic digital painting style with visible painterly brush strokes, soft blended edges, and subtle mural imperfections. The can has a luxurious iridescent holographic finish with shifting pastel reflections in cyan, magenta, violet,
How to Make a Birthday Video with Canva
Quick summary up front — skip the long intro and jump straight to the guide that will teach you how to make a birthday video with Canva. Not a boring slideshow, and not a project that eats up your whole week. Something practical and good that, in my opinion, anyone can pull off. I used to rely on Canva constantly for work — there wasn’t a single day I didn’t open it. And even though I felt like I knew the tool well, I was always aware there were plenty of interesting options I hadn’t gotten around to exploring. But there’s a lot there, and who has time to dig into everything. Over the past year I’ve drifted away from Canva quite a bit, mostly because my career took a turn and became focused on creating AI videos and automation workflows. But while Canva and I grew apart, Canva didn’t stay in the same place — it kept updating and updating. And by the way, that’s one of the things I actually like about Canva as a company — they’re very responsive to what users need, and they keep adding the features we all wished for. I wish I could say the same about Fiverr, where every attempt I’ve made to get support has ended in disappointment. This week, when my card got charged for another year of Canva subscription, I decided to log in and see what was new. Honestly, my eyes glazed over — a wall of a million new things. It looks like by the time you finish learning everything that’s there, half of it will already be outdated. Yes, you’re witnessing the FOMO of an AI video creator, and honestly of anyone working with AI, trying to keep up with a world that changes completely every other day. If that sounds familiar, you’ll find more roundups like this in our guides section. Making a Birthday Presentation with Canva Has Never Been This Easy It’s nothing new that you can put together a slick presentation with Canva. Canva has always offered tools for combining photos, video, text, audio and various effects. And if you had real creativity plus a good grasp of the tools, you could make genuinely impressive things. So what’s changed? Creativity is still valuable, but if you don’t have much of it, you can basically outsource it to Canva, and the result isn’t bad at all. And time-wise, Canva will handle it while you go grab coffee, answer emails, or call your grandkids. And even though everything happens automatically, you still get plenty of customization options. Now, after all that talking, it’s time to explain how you actually make a birthday presentation with Canva. And of course this isn’t just for birthdays — it works for pretty much any occasion where you want a presentation built from photos. How to Make a Birthday Presentation with Canva — A Practical Guide The first step is gathering the photos. Honestly, for a lot of people this is one of the hardest parts. When it’s someone we love, we usually have countless photos and it’s hard to choose the best ones. It’s completely normal to have 10,000 photos sitting on your phone. And if we’re talking about people over 20, there’s also a big batch of photos from digital cameras, from before the smartphone era. And if someone’s over 30 — there are probably childhood photos that need scanning too. My tip: don’t go overboard with the number of photos. Look for shots from different ages, and from all the meaningful moments in life, and gather them together in one library. Once you have the photos — upload them to Canva. Write the prompt you want, and within moments you’ll get a few presentation options to choose from. Here’s a demo of the whole process on video: To Wrap Up — My Recommendation In my opinion, an AI video for a birthday is a bit more impressive than a standard presentation. But making videos — like growth videos — that are built from a lot of photos can turn into an expensive project. Though maybe combining a Canva presentation with a few AI touches can bring the cost down. And maybe you can even pull it off yourself. And as always, Electric Puma is here if you need us. Whether you’re after a birthday presentation for grandpa, a growth video for a bar mitzvah, or any other kind of AI video — that’s exactly our world. If you want to see more of what we do day to day, follow us on Instagram. Questions and Answers ❓ How long does it take to make a birthday presentation in Canva? It depends on how many photos you have and how much customizing you want to add, but broadly speaking it’s a matter of minutes, not hours. Canva builds you an automatic first draft the moment you upload the photos and write the prompt — from there you’re just polishing: reordering photos, swapping the music, adding a personal caption. That’s the real difference between the Canva of a few years ago, which required you to build every slide yourself, and the Canva of today. ❓ Do you need a paid subscription to make the video? Some of the newer features, like automatic presentation creation from photos, are available on the free plan too — but with Pro you get more templates, more effects, royalty-free music, and no watermark on export. If it’s a one-off video for a family event, the free plan or a free trial will probably do the job. If you’re planning to do this again and again, the subscription pays for itself. ❓ What do you do if you have too many photos and can’t decide? Don’t try to cram everything in. Pick by this principle: one or two photos from every meaningful stage of life — childhood, teenage years, big events, recent years. That way you get a varied story without the video dragging
How to Create the Gel Tube Trend with AI
Textures, surfaces, and a little ASMR audio — they always stop the scroll and perform well on social. And the latest hit trend, the Gel Tube Trend with AI, turns a simple gel squeeze tube into delicious fruits (and you can try other things too). This isn’t exactly a tutorial, because there’s really nothing to teach — all you need to do is copy the prompt into Gemini Omni and you can create identical videos. But I’m not just handing you AI prompts — I want you to understand the logic behind them, get creative, and find ways to weave them into AI ads and social content you’re already producing. The directions you can take this are wide open. So here are the core prompts. It took me a while to identify the nuances and build the perfect version — and I’m showing you the actual prompt I used. You may have noticed that AI tutorials online don’t always share the real thing (and that’s never by accident). This isn’t just something satisfying to watch — it’s also how you make it. What Is the Gel Tube Trend with AI? The Gel Tube Trend with AI is the viral ASMR-style video format where a squeeze tube appears to be filled with a fruit — pitaya, peach, or avocado — right before it “squeezes out” in a hyper-satisfying close-up. It’s built entirely from one well-crafted prompt fed into Gemini Omni, and it’s exactly what you’ll learn to recreate below. https://youtu.be/Oy58OQZE9ig The Dragon Fruit Prompt 🐉 Let’s start with nature’s most photogenic fruit — the dragon fruit. Everyone knows it’s easy to make it look weird, but for an AI video creator, the real skill is turning that exotic look into a luxury ad you actually want to bite into. The following prompt takes those insane colors and gives them a Hollywood-grade treatment — just to show you how AI video creation can turn even a supermarket fruit into a piece of art. Dragon fruit is something I genuinely love, and it’s hard to stay indifferent to those vivid pinks and purples. Here’s the prompt that’ll make every dragon fruit fan reach toward the screen: 8-second surreal 8K ASMR cinematic macro video. One continuous locked-off shot. Extreme close-up. Photorealistic. Hyperrealistic. Soft diffused studio lighting. Neutral color grading. Shallow depth of field. Dark gray matte textured surface. A human hand enters from the right holding a transparent squeeze tube labeled “Dragon Fruit”. Inside the tube is thick translucent magenta jelly. The hand slowly applies steady pressure. The very first drop leaving the nozzle instantly becomes the front tip of a dragon fruit. From that exact moment, the fruit grows continuously and directly from the nozzle. The fruit itself is the extrusion. There is never any free-flowing gel, puddle, blob, ribbon, splash, or excess material on the surface. Every newly extruded millimeter is deposited directly into its final position, extending the fruit’s geometry exactly like an ultra-precise transparent gelatin 3D printer. The growing fruit remains physically attached to the nozzle during the entire construction process. The rounded body grows first in one continuous motion. As the body grows, each leaf-like scale is simultaneously sculpted from the same flowing jelly, emerging naturally from the surface while it is being deposited. The scales are formed during construction, never afterward, and never appear suddenly. The nozzle extrudes only one material: translucent vivid magenta jelly. The body remains vivid translucent dragon-fruit magenta throughout the entire construction. The scales gradually develop a fresh translucent green tint while remaining physically connected to the magenta body. No separate green gel is ever extruded from the nozzle. The material always behaves like premium gelatin with realistic viscosity, smooth flowing motion, crystal-clear translucency, glossy wet reflections, subtle internal bubbles, soft subsurface scattering, and satisfying jelly wobble. There is no morphing. There is no hidden transformation. There is no object emerging from inside the gel. There is no liquid-to-object transition. The fruit is visibly constructed every frame directly from the nozzle. The dragon fruit is completed at the exact instant the extrusion stops. The squeeze pressure is released immediately when the fruit reaches its final size. No additional gel is extruded after the fruit is complete. The nozzle cleanly separates from the fruit without leaving any drops, strings, residue, or trailing gel. The finished fruit is a single sculpted piece of luxurious translucent jelly shaped exactly like a dragon fruit, with a vivid magenta body and delicate translucent green scales. It does not resemble natural fruit skin. The completed jelly dragon fruit remains on the dark gray surface and slowly rotates approximately 20 degrees, allowing the light to refract beautifully through the translucent gelatin, revealing internal depth, glossy reflections, and subtle jelly movement. Ultra satisfying ASMR. Continuous geometric construction. Direct gelatin extrusion. Single uninterrupted shot. 📋 Copy prompt The Peach Prompt 🍑 You can’t talk social media without talking emojis, and the peach is undisputedly the king of keyboard metaphors. As a way to break up the studio routine, I asked the model to design a peach that keeps the familiar emoji silhouette — but with cinematic texture and depth. That’s exactly the advantage of AI film production: the flexibility to switch between styles in seconds and produce creative content people simply can’t scroll past. Look at the prompt and tell me — does it look enough like your favorite emoji? 8-second surreal 8K ASMR cinematic macro video. One continuous locked-off shot. Extreme close-up. Photorealistic. Hyperrealistic. Soft diffused studio lighting. Neutral color grading. Shallow depth of field. Dark gray matte textured surface. A human hand enters from the right holding a transparent squeeze tube labeled “Peach”. Inside the tube is thick translucent peach-pink jelly. The hand slowly applies steady pressure. The very first drop leaving the nozzle instantly becomes the bottom tip of a peach emoji. From that exact moment, the peach emoji grows continuously and directly from the nozzle. The peach itself is the extrusion. There is never any free-flowing gel, puddle,
How to Create an AI Advertisement with a Collage Image
In recent years, AI videos have become one of the most effective types of content on social media. Instead of settling for a static image, you can take a single design and turn it into a dynamic video within minutes — something that looks like a campaign from an international brand. And when it comes to AI advertisements for businesses and ecommerce, this capability has completely changed the rules. One style we particularly love is Collage Animation — a video where layers of paper, images, typography, and graphic elements build up gradually until the final announcement is revealed. The result is eye-catching, scroll-stopping, and fits almost any industry — from consumer products to AI videos for ecommerce in a full commercial style. The collage style works exceptionally well because it creates a sense of movement even when the frame is nearly static. The eye travels between layers, textures, and colors, so even a very short video feels rich and engaging. That’s one of the reasons this style is common in campaigns for fashion, music, and technology brands. Today I’m going to show you how to create stunning AI ads quickly and easily — ads that look incredible in the feed and can also be embedded in ecommerce websites. It’s simple, straightforward, and essential knowledge for anyone creating AI videos for ecommerce sites. The tools we’ll be working with are ChatGPT for image creation, and the video generator Seedance 2. ChatGPT will also help us prepare the prompt for the video generator. Why Does Collage Animation Stop the Scroll? Before diving into the process, it’s worth understanding why this style works so well. Most social media ads are born and die in the first second. The viewer doesn’t wait — they scroll. To stop them, something visual needs to happen that creates a sense of depth and movement from the very first moment. Collage animation does exactly that: the video starts from a blank canvas and builds itself layer by layer. The human brain is wired to follow things that change, so the viewer finds themselves watching until the end — what’s coming next? What will the final reveal be? On top of that, this style is highly versatile: it can be adapted for luxury brands, local businesses, tourism, headphones, and even events. It’s not a style that struggles to connect with an audience — it speaks to everyone through smart visual storytelling. An AI Advertisement in 3 Steps Step 1: Creating the Collage Image in ChatGPT In the first step, we go into ChatGPT and enter the following prompt. In our example, we chose Bose QuietComfort headphones as the hero product — but you can swap in any other product: Create a bold collage-style advertising poster featuring the provided blue Bose QuietComfort Headphones as the hero product. Preserve the exact shape, proportions, logo placement, and matte blue finish of the headphones. Emphasize world-class noise cancellation, premium comfort, and immersive sound. Build the composition using torn paper textures, ripped paper edges, magazine cutouts, urban photography, music waveforms, graffiti elements, paint splashes, halftone textures, layered paper scraps, and oversized editorial typography. Use a premium color palette of deep navy blue, cobalt blue, charcoal black, off-white, and subtle metallic silver accents to complement the product. Design with a luxury street-fashion campaign aesthetic, dynamic asymmetrical composition, layered mixed-media collage, bold negative space, dramatic scale, cinematic lighting, realistic shadows, premium product photography, razor-sharp focus, ultra-detailed textures, contemporary editorial graphic design, award-winning art direction, high-end commercial advertising, 8K. Along with the prompt, upload the product image you want to incorporate into the poster. ChatGPT will use the image as a base and build the collage design around it. And within a few seconds, you’ll receive this image: The reason this prompt works so well is the combination of specific instructions within the body of the text: we ask for the product to be preserved exactly as-is, and we define the design style in detail — textures, color palette, aesthetic — while giving ChatGPT creative room within clear boundaries. Step 2: The Video Prompt Now we don’t need to think at all — we ask ChatGPT to do the work for us. Just type in the following command: generate a video prompt that starts with a blank canvas and gradually builds the poster by animating each collage layer into place Within seconds you’ll receive a ready-to-use prompt for Seedance 2, describing exactly how each collage layer will enter the frame — from dark to light, line by line, until the full poster is revealed. This is one of the great advantages of working with AI: we’re not just producing content — we’re using one tool to optimize our use of another. Step 3: Generating the Video in Seedance 2 In the third step, we copy the prompt we received from ChatGPT and paste it into Seedance 2 together with the image we created. In our example, I chose to create an 8-second video — but you can choose more or less depending on your needs. A 5–6 second video works great for Instagram and TikTok. A 10–15 second video is better suited for paid ads that need more screen time. After clicking the Generate button, within two to three minutes you’ll have your video. Creating AI Ads for Any Purpose The specific prompt I showed you was designed for headphones, but you can adapt it in the same way for other products. Here are a few guidelines to help you: Choose a design style that fits the product. Headphones and electronics work great with an urban, street-fashion aesthetic. Beauty products benefit from a softer style with florals and organic textures. Premium and luxury goods call for a gold-and-black palette with torn pages from high-end magazines. Keep the product accurate. Always include an instruction in the prompt to preserve the product’s shape, logo, and original colors. ChatGPT sometimes tends to “improve” the product — make sure it knows the image you uploaded is the fixed reference. Don’t
The AI Sticker Effect: How to Create a Viral Peel Animation in 6 Seconds
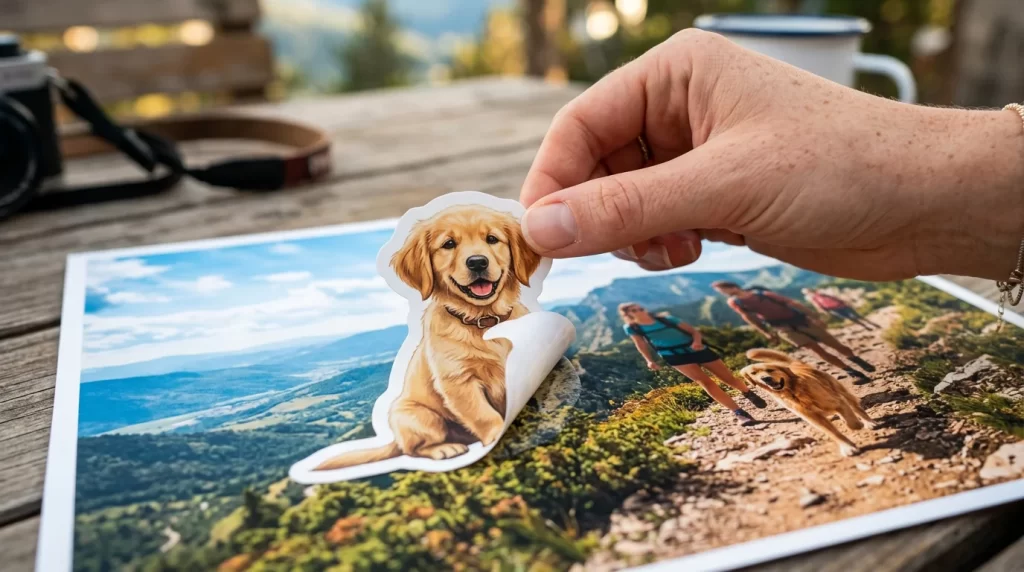
The Magic Hidden Behind One Image Sometimes the most eye-catching videos online don’t cost a lot of money and don’t require hours of work. The sticker peel effect is the perfect example of this. One image, the right prompt, and 6 seconds that stop the scroll. It’s been blowing up on social because it has everything a great hook needs — a moment of surprise, immediate movement, and curiosity that pulls you forward. In this post, I’m going to show you exactly how to create it with AI — and how you can integrate it into real AI video marketing content. What’s Going to Happen Here Technically, this is fairly straightforward. The more important point is your creativity — the ability to take the technical side and weave it cleverly into the content you’re creating. This effect can be done with any character or object, whether it was created with AI or is a completely real photograph. All you need: one image and one prompt. Creating the Sticker Effect — Step by Step Step 1 — Choose an Image with a Clear Object The first thing you need is an image with a distinct object that you want to “peel” from the background. I used a photo of a dog in a park, but it really can be any image you want — a product, a logo, a character, an animal. The more defined the object is and the more it stands out from the background, the more natural and convincing the AI animation will be. Step 2 — Upload to Seedance 2 and Choose 6 Seconds Upload the image to Seedance 2 and choose to generate a video of 6 seconds. This is the ideal length for this effect — long enough for the AI to build the movement naturally at a reasonable pace, and not so long that the viewer loses interest. Step 3 — Paste the Prompt and Click Generate The Full Prompt: The dog is a die-cut sticker attached to the original photograph. A realistic hand enters the frame and peel of the entire dog sticker from top to bottom. The peeling progresses gradually and naturally until the entire main dog has been detached from the image. Once the dog is fully removed, only the empty background remains. The peeled sticker preserves every detail of the original subject, including shape, colors, textures, markings, clothing, facial features, materials, and proportions. After the sticker was removed, the hand is presenting it to the camera and it has a realistic matte white outlines becomes visible along the peeling edge. What Actually Happens The AI creates a motion sequence where the object detaches from the background like a sticker being peeled — starting from the corner, gradually, until the background is revealed behind it. The result: a short moment that looks perfect for Instagram Reels and TikTok viral videos. Why This Effect Works So Well Our brain is used to flat images. So when a character or object suddenly detaches from the background as if it were a sticker, there’s a brief moment of confusion and curiosity — and that’s exactly what stops the finger. The effect works because it does three things simultaneously: Breaks expectations — the viewer has seen thousands of images, but not this Creates immediate movement — already in the first second it’s clear something is happening Generates curiosity — what happens next? Where is the sticker going? That’s what makes people stop, rewatch, and sometimes even share. Marketing Uses — Beyond Funny Videos This effect isn’t just for fun content. You can also integrate it into ads and business content in a way that feels sophisticated, not gimmicky. A few ideas: Peeling a product off a promotional poster — a presentation that feels different from the usual Revealing a business logo — an opening for a brand video Introducing a new product — pulling it out of a virtual package Revealing a sale or discount — the peel reveals the price Transitions between scenes — in a longer commercial video Growth videos — a childhood photo being peeled away to reveal “today” Hooks for Reels and TikTok — a visual hook before the content begins The simple rule: the stronger the connection between the object and the message, the better the effect works — and it feels like a creative choice, not a thrown-in gimmick. Check out more techniques on our blog. Q&A Q: Do I have to use Seedance 2 specifically, or are there other tools that can create the same effect? A: Seedance 2 works great with this prompt, but the concept is also possible with other tools like Kling or Runway. The difference will be in the quality and precision of the movement. At this stage, Seedance 2 delivers the highest quality output for this type of effect. Q: Does the effect work better with AI-generated images or real photos? A: Both work. AI images sometimes give cleaner edges that make it easier for the AI to “peel,” but real photos with a distinct background will work just as well. The rule is: the more the object stands out from the background, the better the result. Q: Is 6 seconds the ideal length, or can you play around with it? A: 6 seconds is the sweet spot for social content — long enough for a complete effect, short enough to keep attention. You can try 4 seconds if you want faster movement, or 8 seconds if there are multiple objects peeling in sequence. Summary The sticker effect is a great example of the fact that in AI videos, you don’t always need a complex prompt or complicated editing to create something that stands out. Sometimes a simple idea, one good image, and the right prompt are enough to create a visual moment that stops the scroll. The technical part is the easy part. The real challenge is finding the creative idea that uses the effect in a way that serves a
Recraft V4.1 — Full Review: Pros, Cons and When to Use It
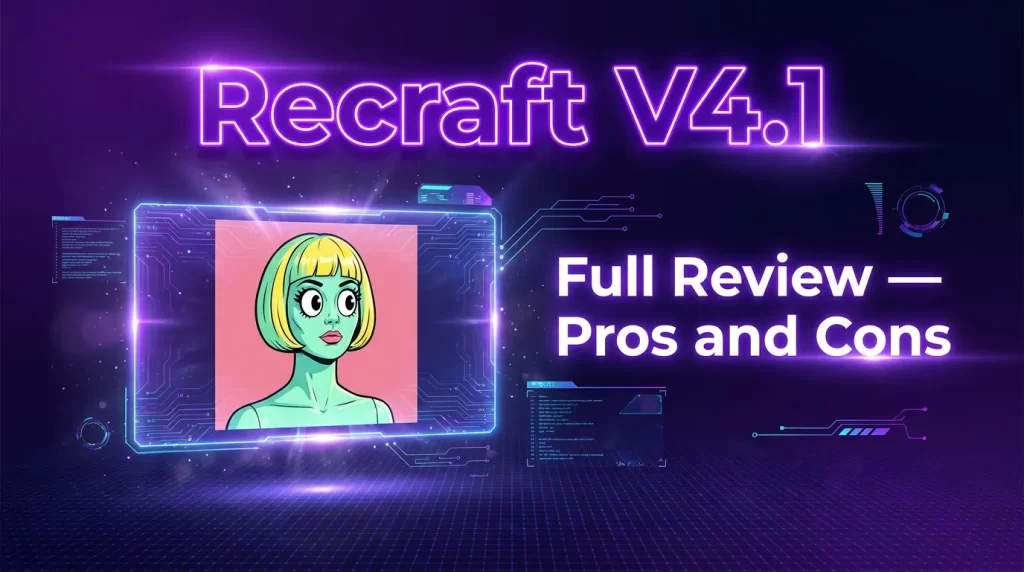
“Beautiful images don’t happen by accident” — so declare the developers of the new image generation model Recraft V4.1, released on May 14, 2026. On paper, the promises sound almost too good to be true: quiet, natural photorealism that actually feels human, and precise understanding of short prompts — without needing to write instructions as long as War and Peace. In addition to promises about exceptional 3D depth and realistic lighting, the new model family brings a dedicated tool for designers — Recraft V4.1 Vector. This is a version created specifically for illustrations, typography, and logos, promising a level of line precision and understanding that makes the output feel like precise human design work. Until recently, AI content creators almost always started from the same point: Nano Banana — and rightfully so. The model proved itself again and again, and it was hard to argue against it. But recently, ChatGPT presented image generation capabilities that directly compete for the crown, shaking the dominance we had gotten used to. And when a monopoly starts to crack — room opens up for the question: maybe it’s time to explore what the other side of the pool has to offer? And that’s exactly the opportunity Recraft V4.1 gives us. In this article, I’ll put the model to a real test against the two most prominent competitors today — GPT Image 2 and Nano Banana 2. We’ll examine portrait creation, complex compositions, and illustrations, and see whether Recraft V4.1 manages to deliver results worthy of your portfolio. For a deeper dive into professional AI video workflows, check our other guides. 3D Design in a Non-Realistic World When I compare image generators, I find more interest in non-realistic styles. Sure, realistic images have their importance too — and in my professional work I mainly work with realism. But if I need a realistic image of a dog, a person, or both together — I know any decent image generator can deliver that. Each has its own style, but in the end a dog is a dog and a person is a person. When it comes to a non-realistic world — that’s where the model can best express its true design personality. The prompt I tried: A highly stylized portrait of a surreal mannequin figure with pale, desaturated mint-green skin and a glossy finish. The figure has an unnatural, short, geometric yellow bob haircut with a fringed texture. Its eyes are replaced by two very large, circular, deep black sockets with oversized, high-contrast white eyeballs and small, centered black pupils, creating an unsettling, vacant gaze. Below the eyes is a heavy dust of purple/magenta contouring on the cheekbones, and full, deep red lipstick. The figure wears a vintage-inspired outfit: a light pink vertically striped shirt with a large, glossy yellow oversized Peter Pan collar featuring a subtle ruffled trim. The figure stands centered against a complex, color-blocked abstract background. Directly behind the head is a large teal-blue circle with a cloud-like texture. This circle is set against a background split between pink radiating sunburst stripes on the upper left and a mottled, textured blue surface on the lower right, within a pink frame. The entire piece has a clean, retro-pop art, mixed-media, and matte texture aesthetic. The lighting is soft and even. Image 1 — Nano Banana Pro: Nano Banana Pro Image 2 — Recraft V4.1: Recraft V4.1 Overall, I feel the Nano Banana image is more harmonious. And my assessment is that all image generators ultimately try to provide harmony — maybe even uniformity. So while I prefer Nano Banana’s interpretation, I’m definitely impressed by Recraft’s ability to put into one image compositions that don’t convey harmony, containing a kind of “design shout” that can suit certain purposes. What’s interesting to notice is the color treatment: with Nano Banana, the shades of pink, teal, and blue work together like a pre-planned palette — even the contrast between the figure and background feels calculated and balanced. Recraft, on the other hand, took a more aggressive approach: the teal circle behind the head is very dominant and “takes over” space that in Nano Banana is part of a smoother sequence. The result is that Recraft feels like a collage — each element screaming for itself — while Nano Banana feels like graphic design where everything works as a single unit. For advertising images that need to stand out and not get lost? Recraft can work exactly for that. Working with Minimalist Prompts I said earlier that non-realistic prompts are more interesting because they allow the model to express its design style with maximum clarity. But before examining photorealistic capabilities, I thought of another way to let the model express its personality — a minimalist 3-word prompt, without any style definition, environment, or other detail. Complete creative freedom. Even creating viral AI videos starts with understanding how models respond to minimal input. This isn’t useful when I create AI ads and client work, but as an AI content expert — it’s important to know each model under lab conditions. That’s what helps achieve optimal results in every professional creative. Intense chess match Image 3 — Nano Banana 2: Nano Banana 2 Nano Banana gave a realistic image — maybe even synthetic-looking. I was a bit surprised by the clothing style choice; the image has a slightly old vibe. But that’s completely fine — I didn’t define any style and gave the model free rein. Image 4 — Recraft V4.1: Recraft V4.1 I loved the interpretation that put the emphasis mainly on emotion. The image itself was fairly standard — a chessboard in the middle, a player on each side with a focused, serious gaze, and a blurred background directing attention to what really matters. Something about the right player’s hands looked slightly unnatural to me — the right hand stands in the air in a somewhat forced pose, and the left hand looks cut off. But what I really loved were the faces: this model was a
How to Animate Dialogue in AI Video — A Practical Guide
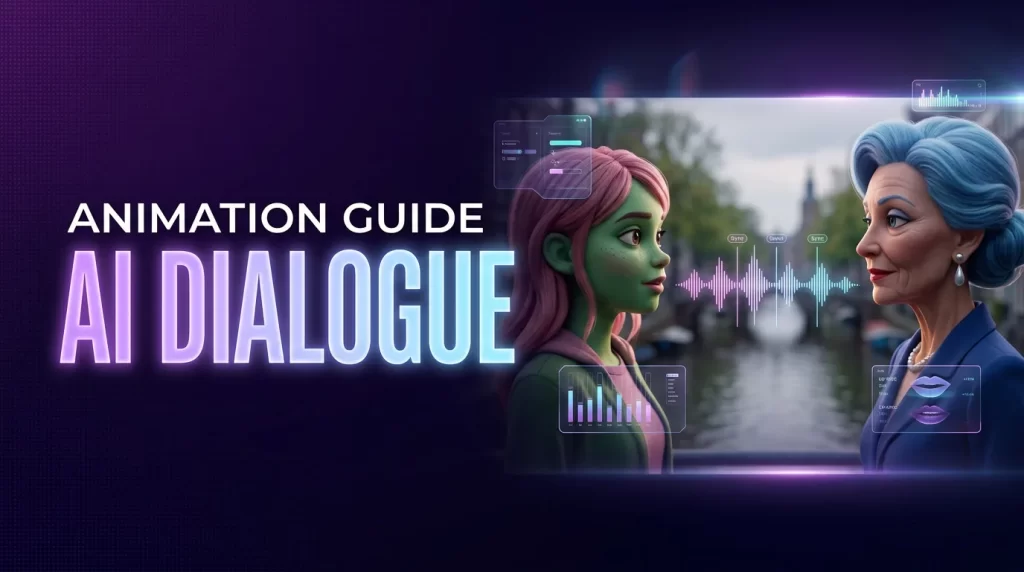
There’s a lot to cover when it comes to AI and video creation. Everyone has their own learning style and their own way of delivering value to an audience. My way is sharing insights from my actual professional work — the stuff I run into every day as an AI filmmaker. And trust me, there’s always a new challenge waiting. I’ve cleared plenty of roadblocks, but new ones keep showing up. What I want to show you today is how to create an AI video featuring an interesting dialogue between two characters. Is this the most impressive thing you can do with AI? Probably not — there are flashier tricks out there. So why bother writing a guide on it? Because, as I said, this comes from real work. If you’re creating AI ads or social content — TikTok videos, Instagram reels — you’re going to find yourself building a lot of dialogue scenes. It’s useful for AI film competitions, explainer content, ads, comedy, and a hundred other creative directions. And if you’re stuck in a creative block right now, dialogue might be exactly the angle worth exploring. Sometimes You Don’t Know Where to Start When I first got into AI, the ability to generate 8 seconds of frame-to-frame animation (start frame + end frame) felt like magic. Every scene had to be broken down into individual shots, and you’d generate massive amounts of images and short clips just to express something complex. Then Seedance 2 arrived and simplified everything. But “simplified” doesn’t mean your brain follows. We still tend to overcomplicate it — over-thinking the process, breaking everything into a thousand micro-steps out of habit. That’s probably an old-school creator problem. When you’re trained to decompose every idea into a frame-by-frame breakdown, letting go of that instinct takes a second. The Practical Guide to AI Video Dialogue All You Need Is 3 Images and a Dialogue Track One image of Character A One image of Character B One image of both characters together The dialogue — an audio file you created with ElevenLabs The tools: GPT-4o for image generation (though any image generator will do the job), and Seedance 2 as the video model. Kling could technically work here too, but Seedance is the smoothest and most capable option available right now — so that’s what this guide is built around. One thing worth noting about the dialogue length: my dialogue runs around 30 seconds, but Seedance 2 caps audio input at 13 seconds. So I generated only the first half in ElevenLabs — exactly 13 seconds — and then built the second half separately, using the output from the first generation as a prompt for the continuation. Upload all three images and the audio file into Seedance. Once they’re in, use the following prompt: After running the prompt, I got this: Then I uploaded that first video back into Seedance — no images, no audio file this time. Just a text prompt asking it to continue, with the exact dialogue lines for each character: What We Just Learned Seedance 2 handles multiple reference images simultaneously — no need to split the scene into separate shots manually The model accepts an audio file as input — and syncs lip movements with surprising accuracy Seedance can build continuity — the first generated video becomes the foundation for the second If you want to go deeper on working with AI animation and building complex scenes, there are more guides on the Electric Puma blog. Follow us on TikTok for more AI filmmaking content. You might also like AI Video Pipeline — A Smart Workflow for Efficient and Cost-Effective Production